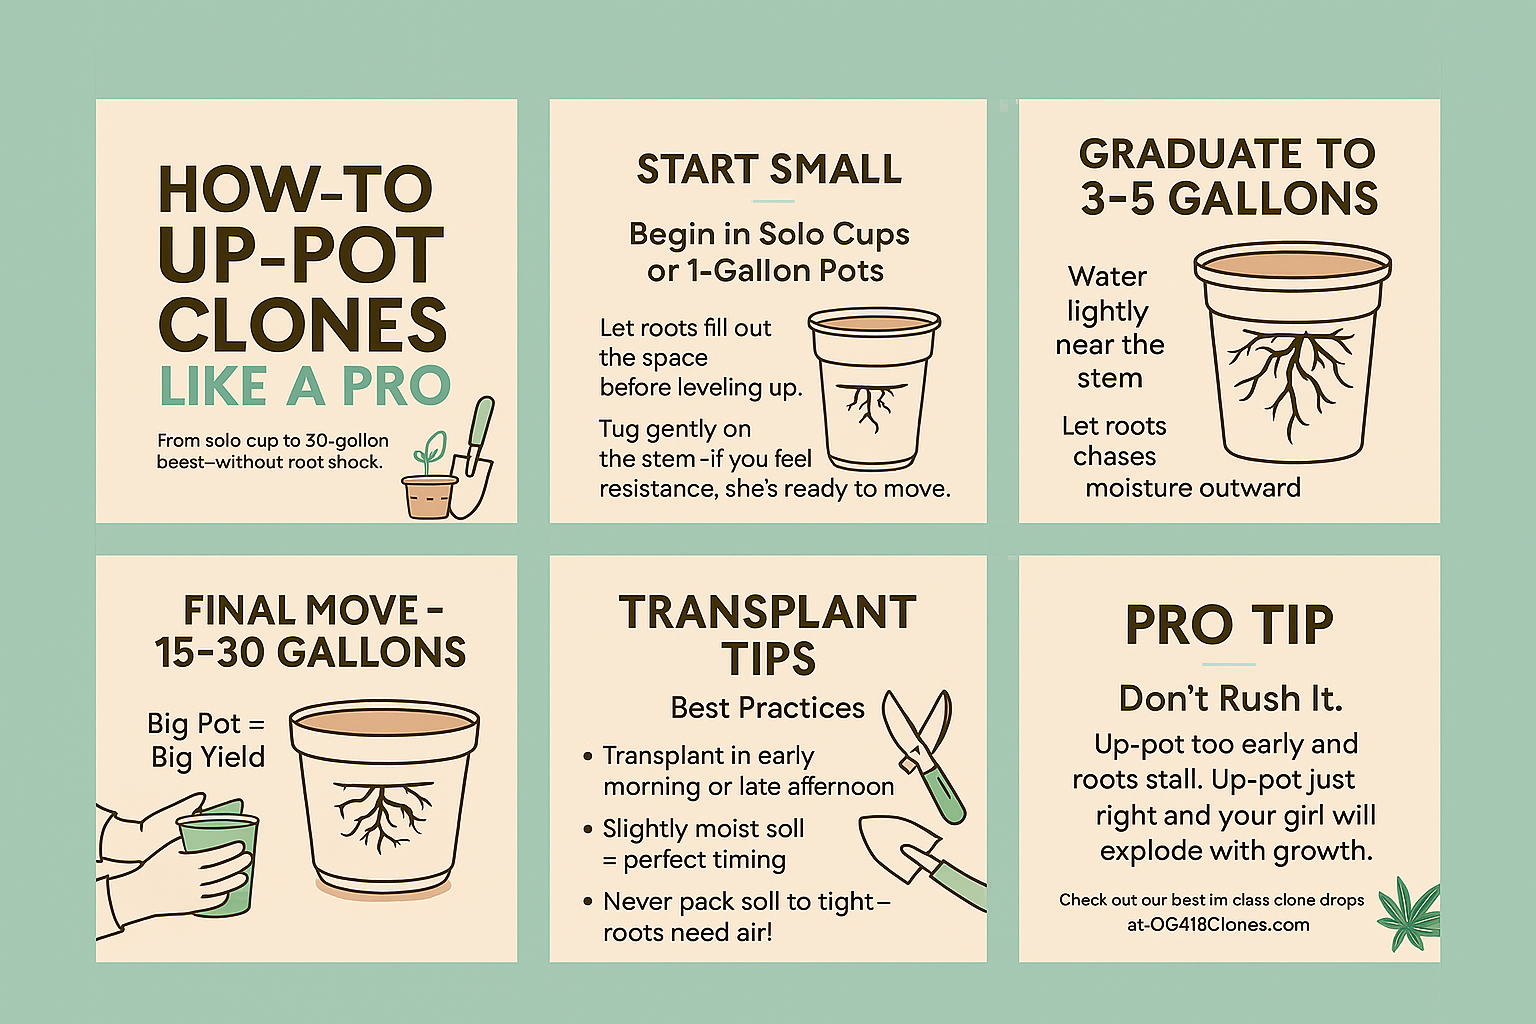
🧤 STAGE 2: THE MOVE-IN
Alright, your clone’s been giving signs — she’s ready to leave her red Solo starter home and stretch those roots. But before you drop her straight into a 15–30 gallon pot, consider this:
OG Tip: Use a stepping stone pot (3–5 gallon size).
It helps prevent overwatering and lets your plant adjust gradually to her growing role. Think of it as a one-bedroom before the mansion.
![💡]() Why Add This Extra Step?
Why Add This Extra Step?
 Why Add This Extra Step?
![🌱]() Less transplant shock
Less transplant shock![💧]() Easier to manage moisture levels
Easier to manage moisture levels![📈]() Encourages faster root development
Encourages faster root development
 Less transplant shock
 Easier to manage moisture levels
 Encourages faster root development
Especially helpful if:
You’re working with cooler spring soil
You’re growing autos or small-structure photoperiods
You’re not confident about soil hydration in large pots yet
![🧤]() What You’ll Need:
What You’ll Need:
 What You’ll Need:
A 3–5 gallon pot (fabric or hard plastic)
High-quality soil mix (compost, worm castings, perlite)
Optional: Mycorrhizae, root booster powder
Clean hands. Chill vibe.
Water and good intentions
![💦]()
![💚]()


![🚶]() How to Up-Pot (Stepping Stone Style):
How to Up-Pot (Stepping Stone Style):
 How to Up-Pot (Stepping Stone Style):
Fill the pot ¾ full with your pre-moistened soil mix.
Gently remove your clone from the Solo cup.
No yanking — let gravity and a soft squeeze help.Inspect the roots. If they’re circling, massage them loose.
Nestle your plant in, centered and cozy.
Backfill and pat lightly, don’t pack it down too much.
Water in with a light feed or plain pH’d water.
![⏭️]() When to Move Into the Final Pot
When to Move Into the Final Pot
(15–30 Gallon)
 When to Move Into the Final Pot
 After 7–14 days in the 3–5 gal:
She’s rooted in strong
New growth is poppin’
The pot feels lighter faster = roots are eating and drinking well
Then it’s time for the big move.
If you want to skip the middle pot, you can. But be extra mindful of:
Moisture control (don’t overwater the big pot)
Shading your clone for a few days after transplant
Patience — root development will take a little longer at first

![🌿]() In OG Terms:
In OG Terms:
 In OG Terms:
“She ain’t gonna thrive in a mansion if she’s still learning to walk.”
Ease her in. She’ll reward you with lush leaves and juicy colas.
![👇]() WRAP-UP: OG-LEVEL UP-POTTING CHECKLIST
WRAP-UP: OG-LEVEL UP-POTTING CHECKLIST
 WRAP-UP: OG-LEVEL UP-POTTING CHECKLIST
 Wait till roots are packed but healthy Use 15–30 gal pots with aerated, pH-balanced soil Water well and let her adjust post-transplant No feeding frenzy right away Let the roots do their thing
![💬]() Final Words from the Cup Crew
Final Words from the Cup Crew
 Final Words from the Cup Crew
Don’t overthink it. Up-potting is just part of the journey from lil clone to chunky queen. Treat it like a rite of passage.
Give your girl the space she needs when she needs it—not before. Done right, she’ll reward you with explosive veg growth and heavyweight yields.
Need help picking the perfect pot size for your space? Hit us up at OG416Clones.com or slide into our DMs on IG @og416clones 🌿